First, start off with a photo. I chose this one:
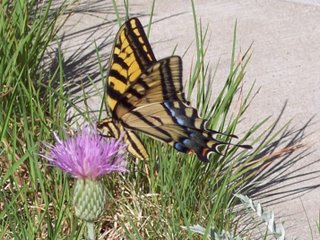
Open this photo in Paint Shop.
Next, go to your tool bar, click on "edit" then "copy" the photo and paste to PaintShop as a "new image."
On the new image, go to the tool bar in PaintShop and click on "colors" then "grayscale." This will change the image to a black and white photo, like this:
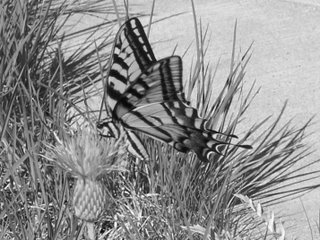
Once you have your black and white photo, click on "edit" then copy this black and white photo and paste it on your original as a "new layer."
Now you will have 2 layers on your original, the top being the black and white image. Now comes the fun part.
Go to your tools and click on the "eraser brush." Pick a size and shape brush which will fit your needs. Now, on the black and white layer, simply erase over the parts where you would like the color to come through. On my photo, I picked the butterfly and the flower. After you are finished erasing, you will have a new picture, like this:
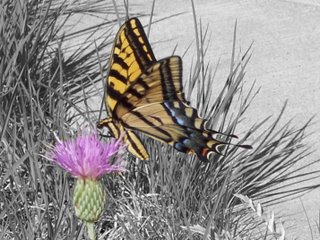
Now, in your layers palette, right-click on one of the layers and then click "merge" then "merge visible." This will merge both layers of your photo into one layer. Now you can save your new photo. Pretty cool, huh.
Just thought I'd share that little trick with you. Have fun!

 My other blogs:








No comments:
Post a Comment